Tutorial: Using Passport OAuth with RethinkDB
I’ve run into many people who have problems setting up authentication on their Node.js applications. Even with a library as great as passport, it’s can be tough to setup authentication in your app. Yet, while it’s tempting avoid it, authentication is essential for many types of applications.
In this short tutorial, we’ll go over how to setup a very simple app that uses the OAuth protocol and the passport Node.js library for authentication. OAuth is an open authentication protocol that lets you sign in to an app using your account from another site. With OAuth, a developer can create an application that lets users sign in with their GitHub, Twitter of Facebook accounts. Passport on the other hand, is an authentication middleware for Node.js. It takes away a lot of the boilerplate behind user authentication.
In this post, we’ll use a boilerplate repo to get all the hard parts of authentication out of the way. This is really the easiest way to get started with passport and OAuth! Users will be able to login and see their username and avatar. They’ll also be able to logout. That’s it. By keeping the functionality of the app as simple as possible, we can focus on just the authentication.
Here’s how it’ll look:

We’ll be using passport along with passport-github and passport-twitter to let users login with GitHub or Twitter. All user data will be stored in RethinkDB. RethinkDB’s schemaless JSON storage makes it perfect to store different kinds of data, depending on the authentication provider. If you don’t have RethinkDB installed yet, make sure you go ahead and install it.
Let’s get started.
1. Clone Repository
The first thing we need to do is clone the repository from GitHub. This repository will have all the code you need to setup this app. Be sure to take a look at the code in the repo to see how all the components work together.
git clone git@github.com:thejsj/passport-rethinkdb-tutorial.git
cd passport-rethinkdb-tutorial
2. Install dependencies
Let’s install our dependencies. You can take a look at all our dependencies here.
First, let’s install passport and its complementary modules. This will be the basis for our authentication.
npm install passport passport-github passport-twitter --save
After that, we’ll install the rethinkdb driver and the rethinkdb-init module, which adds an init methods to the rethindb driver.
npm install rethinkdb rehthinkdb-init --save
As our web framework, we’ll use express. In order to add sessions to express, we’ll use express-session. Express will handle our http requests and our rendering.
npm install express express-session --save
Because we’re doing some basic HTML rendering, we need a rendering engine. For that we’ll use mustache. In order to use mustache with express, we’ll have to use consolidate.
npm install consolidate mustache --save
We also need to manage our configuration files, so that we can change configurations depending on the environment we’re in. For that we’ll use config. Our OAuth key and secret will be stored here.
npm install config --save
Finally, we’ll use nodemon to run our node server, but we only need it for development, so we’ll install it as a dev dependency:
npm install nodemon --save-dev
3. Get credentials
After cloning the repo and installing our dependencies, we’ll want to register an app in both GitHub and Twitter, in order to get our app ID and app secret.
GitHub
In your GitHub account, go to ‘Settings’ and click on ‘Applications’. After that, click on ‘Register New Application’:

Add a name and a description to your app. In the homepage URL add ‘http://127.0.0.1:8000’ and add ‘http://127.0.0.1:8000/auth/login/callback/github’ as your callback URL.

After you ‘Register your application’, copy the Client ID and Client Secret and add them to your config/default.js file:
module.exports = {
  github: {
    clientID: 'f2255fc87f896cfa90a9',
    clientSecret: '5c924493975ea30bf3cc29f27f8880f01373c3d9'
  },
https://github.com/thejsj/passport-rethinkdb-tutorial/blob/master/config/default.js#L3-L4
To register an app in Twitter, go to http://apps.twitter.com. When there, click on ‘Click New App’.

When creating the application, add any name and description and add ‘http://127.0.0.1:8000’ as your ‘website’ and ‘http://127.0.0.1:8000/auth/login/callback/twitter’ as you callback URL.

Then go to ‘Keys and Access Tokens’ to get your consumer key and consumer secret:
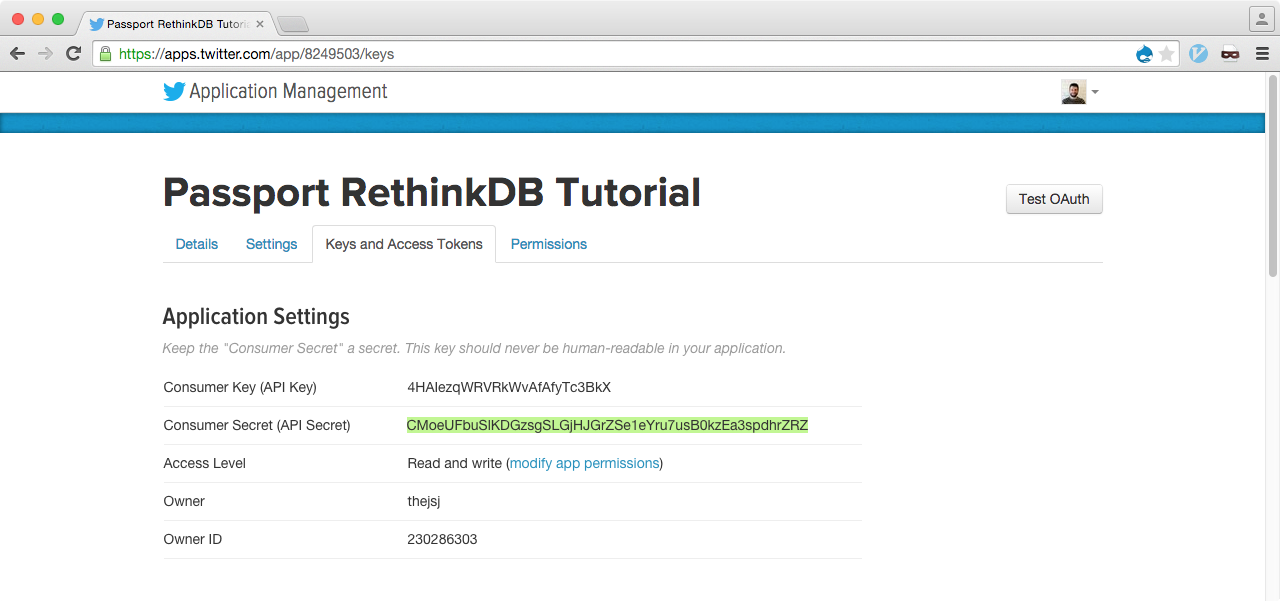
After registering your application, go ahead and add the consumer key and consumer secret to your config file.
module.exports = {
  github: {
    clientID: 'f2255fc87f896cfa90a9',
    clientSecret: '5c924493975ea30bf3cc29f27f8880f01373c3d9'
  },
  twitter: {
    consumerKey: '4HAIezqWRVRkWvAfAfyTc3BkY',
    consumerSecret: 'CMoeUFbuSlKDGzsgSLGjHJGrZSe1eYru7usB0kzEa3spdhrZRY'
  },
https://github.com/thejsj/passport-rethinkdb-tutorial/blob/master/config/default.js#L6-L8
4. Running Your Server
After cloning the repo, installing all dependencies, and adding our OAuth keys, we can now run our server. For that we can use an npm script included in our package.json.
npm run dev
Now go to http://127.0.0.1. You’ll see the following screen:

After clicking on ‘Login with GitHub’, you’ll se the following screen:

After authorizing the application, you’ll be signed in. The app will show your username, avatar and how you logged in.
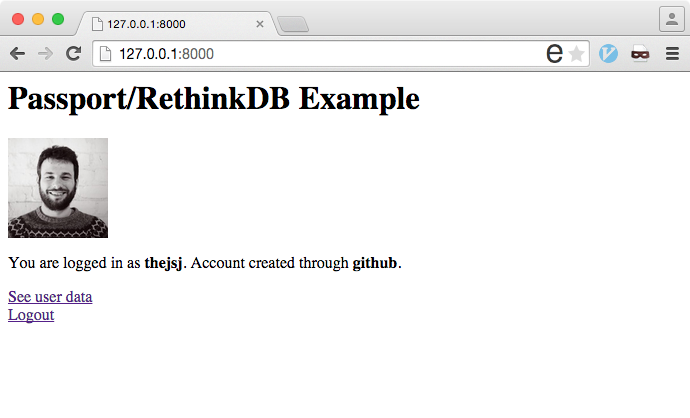
Hooray! It works!
If you go to your RethinkDB data explorer, you can see that the user’s data is saved on the database:

Final Thoughts and Next Steps
This is the quickest way to get started with RethinkDB and passport OAuth authentication. After being able to get this demo running, you can start diving into the code and seeing how all the different parts of the application work together. If you’re not particularly interested in how everything works (that’s totally fine), you can also use this repo as a boilerplate to easily add OAuth authentication to your apps!
After understanding the code, you can go try to add new authentication provides like Facebook, Google and many more. You can also switch from session-based authentication to token-based authentication, which works best on mobile devices.